引入
记录以下相关学习和代码。相关代码和思路是从《计算机图形学入门:3d渲染指南》学习的
开发环境为:
- window10 x64
- visual studio 2022
- c++17
- SDL3
- glm
基本框架
构建基本的渲染循环,之后就可以专注于光线追踪相关代码实现。
 1
 2
 3
 4
 5
 6
 7
 8
 9
10
11
12
13
14
15
16
17
18
19
20
21
22
23
24
25
26
27
28
29
30
31
32
33
34
35
36
37
38
39
40
41
42
43
44
45
46
47
48
49
50
51
52
53
54
55
56
57
58
59
60
61
62
63
64
65
66
67
68
69
70
71
72
73
74
75
76
77
78
79
|
//Main.cpp

#include <SDL3/SDL.h>
#include <SDL3/SDL_pixels.h>
#include <iostream>

#include "softRenderBase.hpp"


int main()
{
    //初始化SDL环境
	SDL_Init(SDL_INIT_VIDEO);
	SDL_Window* window = SDL_CreateWindow("soft-renderer", WINDOW_WIDTH, WINDOW_HEIGHT, 0);

	SDL_Renderer* renderer = SDL_CreateRenderer(window, NULL);
	if (!renderer)
	{
		std::cerr << "渲染器创建失败" << SDL_GetError() << std::endl;
		SDL_DestroyWindow(window);
		SDL_Quit();
		return -1;
	}

	SDL_Texture* texture = SDL_CreateTexture(
		renderer,
		SDL_PIXELFORMAT_ARGB8888,
		SDL_TEXTUREACCESS_STREAMING,
		WINDOW_WIDTH,
		WINDOW_HEIGHT
	);
	if (!texture)
	{
		std::cerr << "texture创建失败" << SDL_GetError() << std::endl;
		SDL_DestroyRenderer(renderer);
		SDL_DestroyWindow(window);
		SDL_Quit();
		return -1;
	}

    //创建缓冲区存储图像数据
	SDL_PixelFormatDetails* format;
	Uint32* pixelBuffer = new Uint32[WINDOW_WIDTH * WINDOW_WIDTH];
	clearBuffer(pixelBuffer, colorFromRGBA(255, 255, 255, 255));

	bool quit = false;
	SDL_Event event;

    //更新缓冲区
    //考虑到使用的cpu进行软渲染,而且我暂时不会进行相关优化。
    //只更新一次缓冲区
	draw(pixelBuffer);

    //主循环
	while (!quit)
	{
		while (SDL_PollEvent(&event))
		{
			if (event.type == SDL_EVENT_QUIT)
			{
				quit = true;
			}
		}

        //更新texture上传到窗口表面
		SDL_UpdateTexture(texture, NULL, pixelBuffer, WINDOW_WIDTH * sizeof(Uint32));
		SDL_RenderClear(renderer);
		SDL_RenderTexture(renderer, texture, NULL, NULL);
		SDL_RenderPresent(renderer);
	}

	delete[] pixelBuffer;
	SDL_DestroyTexture(texture);
	SDL_DestroyRenderer(renderer);
	SDL_DestroyWindow(window);
	SDL_Quit();

	return 0;
}
|
编写绘制单个像素的函数和将RGBA值转换为uint32_t的值的函数。
 1
 2
 3
 4
 5
 6
 7
 8
 9
10
11
12
13
14
15
16
17
18
19
|
void setPixel(Uint32* buffer, int x, int y, Uint32 color)
{
	if (x < 0 || x > WINDOW_WIDTH || y < 0 || y > WINDOW_HEIGHT)
	{
		return;
	}

	buffer[y * WINDOW_WIDTH + x] = color;
}

Uint32 colorFromRGBA(Uint8 r, Uint8 g, Uint8 b, Uint8 a)
{
	return (static_cast<Uint32>(a) << 24) | (static_cast<Uint32>(r) << 16) | (static_cast<Uint32>(g) << 8) | (static_cast<Uint32>(b));
}

Uint32 colorFromRGBA(glm::vec4 rgba)
{
	return colorFromRGBA(rgba.r, rgba.g, rgba.b, rgba.a);
}
|
核心代码
基本结构体的定义
视口相当于设备窗口中虚拟三维世界中的对应,长宽比一般和设备窗口对应。
 1
 2
 3
 4
 5
 6
 7
 8
 9
10
11
12
13
14
15
16
17
18
19
20
21
22
23
24
25
26
27
28
29
|
struct Viewport
{
	float width;
	float height;
	float distance;
	Viewport(float w, float h, float d)
	{
		width = w;
		height = h;
		distance = d;
	}
};

struct Sphere
{
	glm::vec3 position;
	float radius;
	glm::vec3 color;
    Sphere(glm::vec3 p, float radius)
    {
        position = p;
        this->radius = radius;
        color = glm::vec3(255, 255, 255);
    }
}

std::vector<Sphere> sceneObj = {
	Sphere(glm::vec3(0, 0, 7), 1, glm::vec3(0, 128, 0))
};
|
draw函数
 1
 2
 3
 4
 5
 6
 7
 8
 9
10
11
12
13
14
15
16
|
void draw(Uint32* buffer)
{
    //遍历像素
    for (int pixelX = 0; pixelX < WINDOW_WIDTH; pixelX++)
    {
        for (int pixelY = 0; pixelY < WINDOW_HEIGHT; pixelY++)
        {
            float x = (float)pixelX * viewport.width / (float)WINDOW_WIDTH - viewport.width / 2;
            float y = (float)pixelY * viewport.height / (float)WINDOW_HEIGHT - viewport.height / 2;
            y = -y;
            float z = viewport.distance;
            //窗口像素转换为三维空间中viewport对应坐标。
            //...TODO
        }
    }
}
|
射线碰撞检测实现
要实现在屏幕上渲染场景中的球体,最符合直觉也最简单实现的方式是从眼睛所在位置向视口在屏幕像素对应位置发射射线,碰到哪个球就显示什么颜色。实际上我认为从这一步开始学习是最好,很快就能看到屏幕上显示的球,学校教图形是反而从光栅化,插值开始。
那么首先就应该判断射线和球是否相交。
射线需要确定起点和方向。
$S$ 表示射线起点。
$\vec{D}$ 表示射线方向。
要表示射线上任意一点$P$为:
$P = S + t\vec{D}$
球是最为熟悉的,任意点$P$在球上满足:
$(P - O)^2 = R^2$
$O$为球心,$R$为半径。
联立是一元二次方程,根据有无解了判断相交,可求得 $t$ 计算$P$点。
但是要注意的是,射线的t应该是大于零的,对于小于零解要舍弃。和零比较考虑误差用较小值代替。
 1
 2
 3
 4
 5
 6
 7
 8
 9
10
11
12
13
14
15
16
17
18
19
20
21
22
23
24
25
26
27
28
29
30
31
32
33
34
35
36
37
38
39
40
41
42
43
|
struct Ray
{
	glm::vec3 startPoint;
	glm::vec3 direction;

	Ray(glm::vec3 p, glm::vec3 dir)
	{
		startPoint = p;
		direction = dir;
	}
};

//optional是c++17引入的用来表示一些函数不存在结果情况(std::nullopt)的类型
std::optional<float> isRayBallIntersect(Ray ray, Sphere ball)
{
	auto ro = ray.startPoint - ball.position;

	float b = 2.0f * glm::dot(ro, ray.direction);
	float a = glm::dot(ray.direction, ray.direction);
	float c = glm::dot(ro, ro) - ball.radius * ball.radius;

	float result = 0.0f;

	float delta = b * b - 4.0f * a * c;

	if (delta >= 1e-6f)
	{
		float t1 = (-b + sqrt(delta)) / (2.0f * a);
		float t2 = (-b - sqrt(delta)) / (2.0f * a);

		//选取大于零且较小的解
		if (t2 > 1e-6f)
		{
			return t2;
		}
		if (t1 > 1e-6f)
		{
			return t1;
		}
	}
	//无解
	return std::nullopt;
}
|
添加一个新的函数std::optionalglm::vec3 caculateColor(Ray ray)在draw函数中用于计算颜色。并在其中进行碰撞检测。
 1
 2
 3
 4
 5
 6
 7
 8
 9
10
11
12
13
14
15
16
17
18
19
20
21
22
23
24
25
26
27
28
|
std::optional<glm::vec3> caculateColor(Ray ray)
{
	for (auto& sphere : sceneObj)
	{
		auto t = isRayBallIntersect(ray, sphere);
		if (t.has_value())
		{
			if (t >= 0)
			{
				if (!tmin.has_value() || t.value() < tmin.value())
				{
					tmin = t.value();
					frontSphere = &sphere;
				}
			}
		}
	}

	if (tmin.has_value() && tmin.value() >= 1e-4f && frontSphere != nullptr)
	{
		//...TODO
		//可以直接返回颜色试试看结果。
		//return frontSphere->color;
	}

	return std::nullopt;

}
|
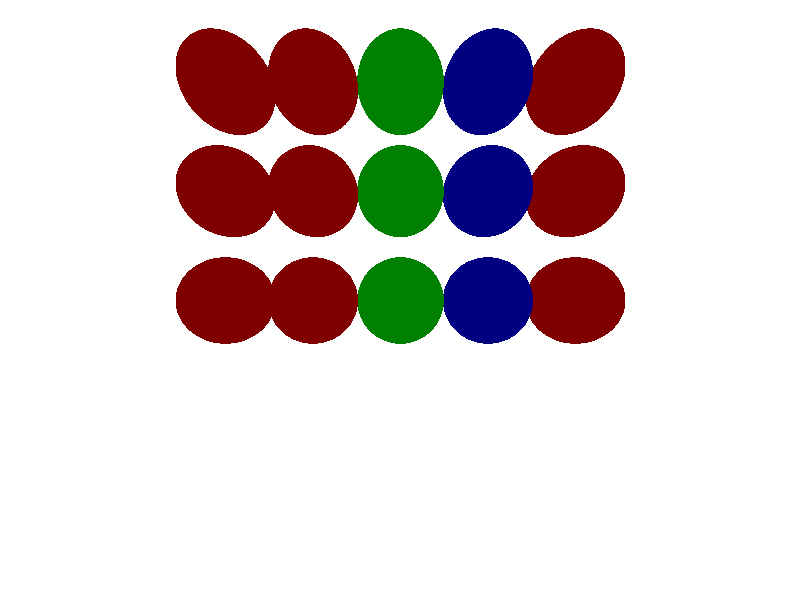
Phong光照模型
在这里我只使用考虑光源与物体表面直接光照,即局部光照模型——phong模型。它是不考虑物体间光线相互反射,能量守恒的简化大概符合经验的光照模型。
其中包括了漫反射,环境光和镜面反射。
以下为符号约定:
$K_a, K_b, K_s$为环境光,漫反射和镜面反射对应的材质系数,决定物体对这些类型的反射强弱;
$I$光源光强;
$\vec{N}$为法线;
$\vec{L}$为光源方向,点到光源;
$\vec{V}$为视线方向,视点到点;
$\vec{R}$为光线相对法线的反射。
- 环境光
假设环境光为一个常量,$K_a$材质环境光系数。
物体返回的环境光强度为:
$i_a = k_a * I_a$
- 漫反射光
强度和夹角余弦相关,物体返回的漫反射光强度为:
$i_d = k_d * I * max(0, \vec{N}\cdot\vec{L})$,max用于防止负值。
- 镜面反射光
$i_s = k_s * I * max(0, \vec{R}\cdot\vec{V})^s$,$s$为镜面反射或者高光指数,用于控制高光范围。
最终返回的光强$I$为 $I = i_a + i_d + i_s$。
为Sphere添加相关参数。
添加calculateLight并修改caculateColor函数为:
 1
 2
 3
 4
 5
 6
 7
 8
 9
10
11
12
13
14
15
16
17
18
19
20
21
22
23
24
25
26
27
28
29
30
31
32
33
34
35
36
37
38
39
40
41
42
43
44
45
46
47
|
// 注意,我这里代码忽略了对应的材质系数。
void calculateLight(glm::vec3& p, Sphere* frontSphere, Ray& ray, float& intensity)
{
	for (auto& light : sceneLight)
	{
		auto n = glm::normalize(p - frontSphere->position);
		auto l = glm::normalize(light.position - p);
		auto r = glm::normalize(ray.direction);

		if (light.type == AMBIENT)
		{
			//环境光
			intensity += light.intensity;
		}
		else if (light.type == POINT)
		{
			//漫反射光
			intensity += light.intensity * std::max(0.0f, glm::dot(n, l));
			//镜面反射
			if (frontSphere->specular != -1)
			{
				auto reflectLight = 2.0f * n * glm::dot(n, l) - l;
				intensity += light.intensity * std::powf(glm::dot(r, reflectLight), frontSphere->specular);
			}
		}
	}
}

std::optional<glm::vec3> caculateColor(Ray ray)
{
	······
	if (tmin.has_value() && tmin.value() >= 1e-4f && frontSphere != nullptr)
	{
		color = frontSphere->color;
		glm::vec3 p = ray.startPoint + tmin.value() * ray.direction;
		float intensity = 0.0f;

		calculateLight(p, frontSphere, ray, intensity);

		color *= intensity;
		color = glm::clamp(color, glm::vec3(0), glm::vec3(255));
		//可以直接返回颜色试试看结果。
		//return color;
	}

	return std::nullopt;
}
|
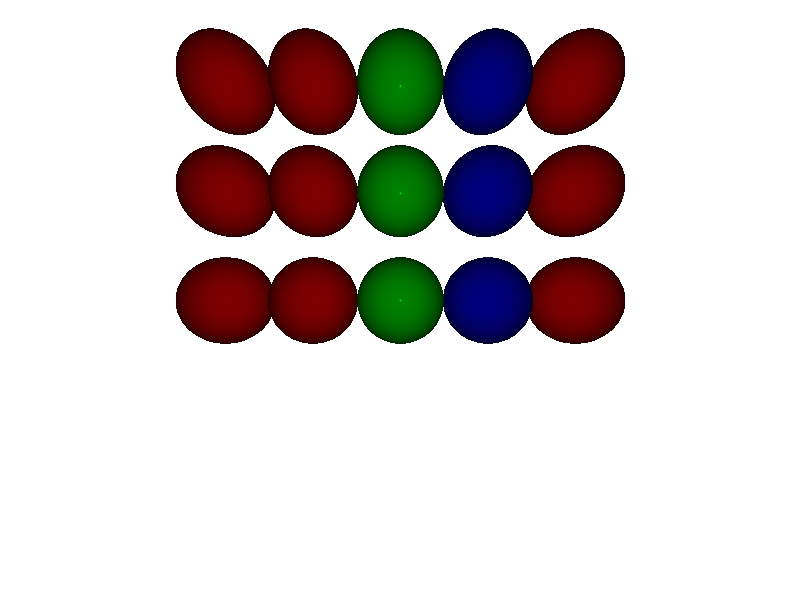
关于镜像——Whitted—style Ray tracing
镜像已经是属于间接光照了,一个简单的想法是,根据光路可逆,计算视线相对法线反射光线。
再以这反射光线为视角,计算它“看到了什么颜色”,用这个颜色参与最终颜色的计算。
这里可以使用递归实现,
先为Sphere添加reflect参数。再添加一个全局常量const int MAX_TRACE_DEPTH设置最大递归深度。
 1
 2
 3
 4
 5
 6
 7
 8
 9
10
11
12
13
14
15
16
17
18
19
20
21
22
23
24
25
26
27
|
std::optional<glm::vec3> caculateColor(Ray ray)
{
	static int depth = 0;
	······
	//计算为颜色后,根据是否有镜像属性决定是否开始递归。
	color *= intensity;
	color = glm::clamp(color, glm::vec3(0), glm::vec3(255));
	if (frontSphere->reflect > 0 && frontSphere->reflect < 1 && depth < MAX_TRACE_DEPTH)
	{
		auto n = glm::normalize(p - frontSphere->position);
		auto l = glm::normalize(-ray.direction);

		//视线相对法线反射光线
		auto reflectDir = 2.0f * n * glm::dot(n, l) - l;

		depth++;
		auto flectColor = caculateColor(Ray(p + 1e-6f * n, reflectDir));
		if (flectColor.has_value())
		{
			return glm::mix(color, flectColor.value(), frontSphere->reflect);
		}
		else
		{
			return color;
		}
	}
}
|
